
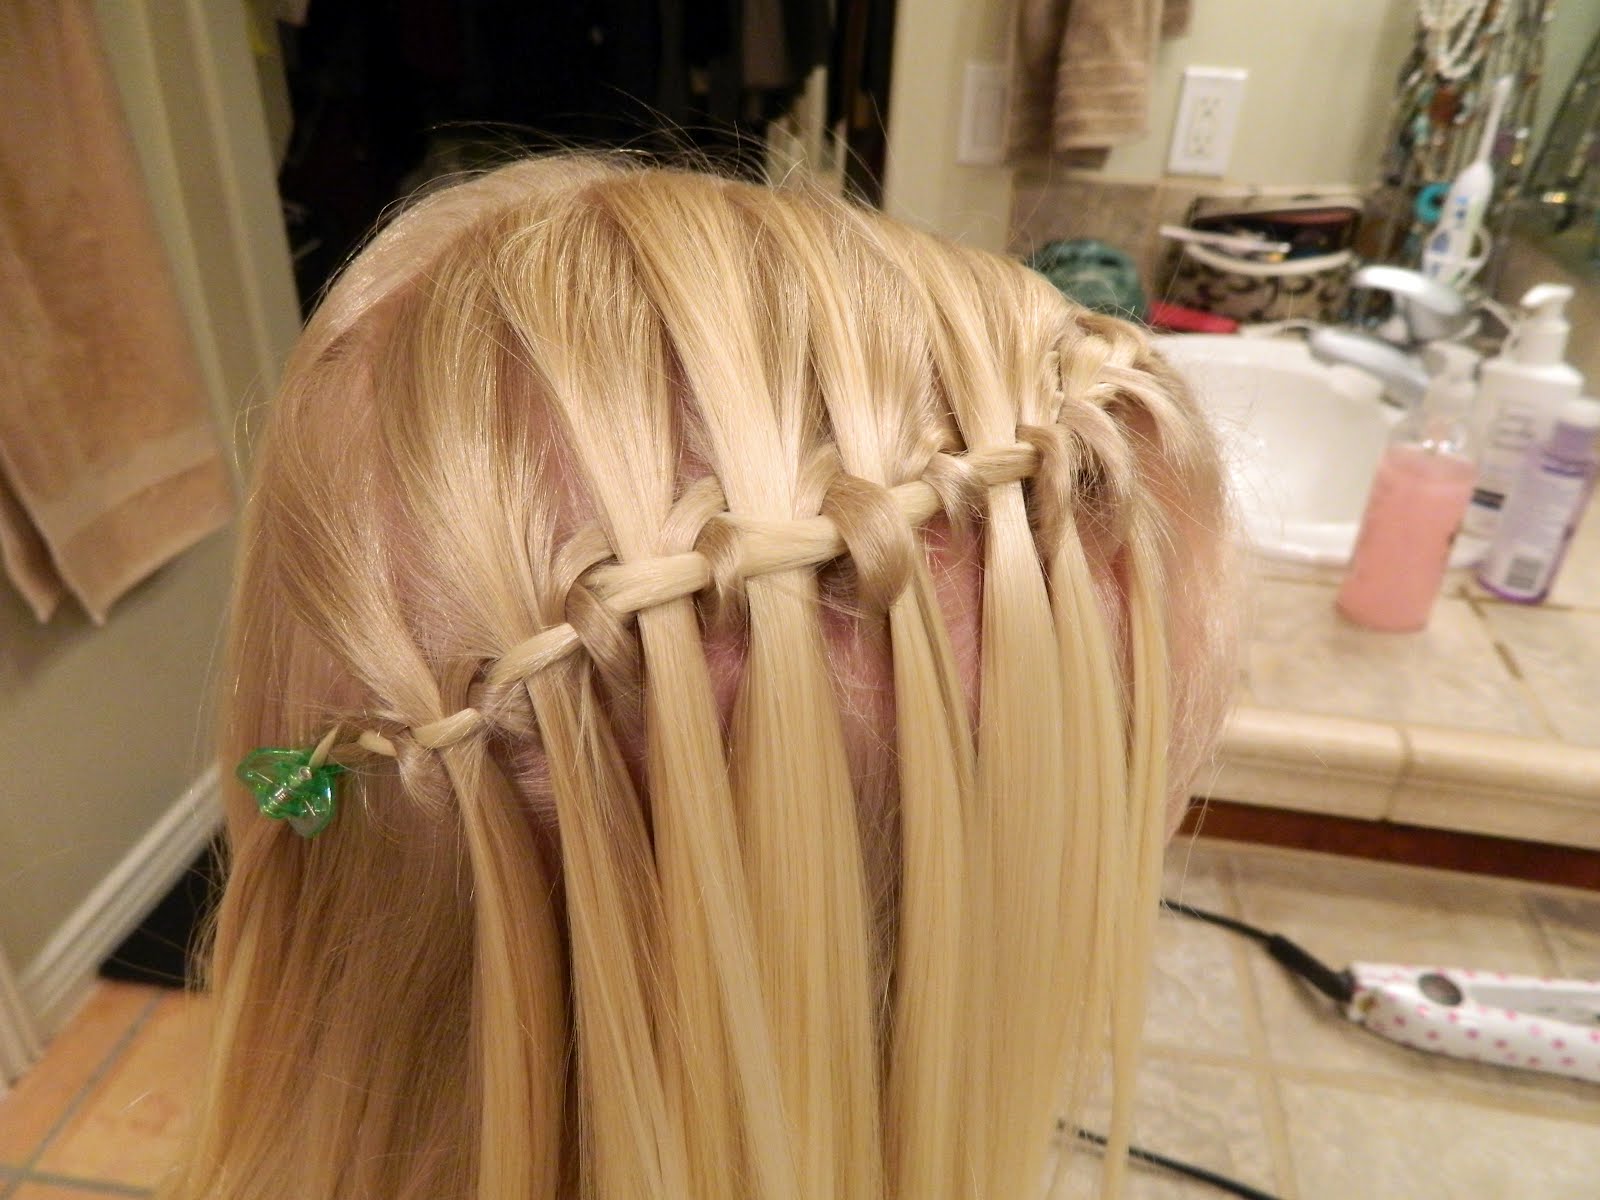
 I had a request for this hairstyle and people have asked me how I do this. It actually looks so cool and hard to do, but really, it is quite easy. I only had 10 minutes, so her hair was a little bumpy. I would make it more chunky next time and spend more time so there weren't any bumps but I was in a hurry.
#1 Part hair on side.
#2 Begin French braiding her hair close to her forehead and on the side. Right over the middle left over the middle. I had to French braid her bangs first because otherwise they would've fall out and it would've looked weird. For girls with their bangs already grown out- just start out French braiding on the side, with their long bangs as the first piece your daughter will hold.
 #3 So once you get to the side start by leaving out the right piece and having your daughter hold it. You should be holding 3 strands. The one on the right is the one your daughter will hold and then you will grab a piece directly underneath the right piece to use as your 3rd strand.
 #4 Start French braiding again, and again, when you get to the part where you usually add the hair to the right piece- just hand the right piece to your daughter first and grab a piece directly underneath to use as your 3rd piece.
 #5 Keep repeating this process. A really cute girl at Adopt a Do shows a video how to do this here. Anyways mine is different because my daughter has bangs I have to deal with, which makes it a little more tricky. (Can't wait until they are grown out!)
#6 Once you get towards the back just put a little clippie in it to hold.
 #7 Repeat process on the left side.
 #8 Tie together with an elastic rubber band.
 #9 Add a bow and voila....one cute little piggie!


No comments:
Post a Comment